INSTAGRAM TWITTER PINTEREST YOUTUBE Image Map

Saturday, February 16, 2013

Palmolive Fresh Infusions Review


I recently received this awesome Palmolive Fresh Infusions box from INFLUENSTER.
Actually, I had never used Palmolive before this because I stuck with what my mother always used.
First, let me tell you what I received in this box. 
Lime Basil
Ginger White Tea
Lemon Thyme
$1.50 off coupons for friends

I absolutely love the Lime Basil. Hands down my favorite scent. It smells exactly like the name states. The smell is strong but not overwhelming at all. I also love the Lemon Thyme and I have been using it in my mop bucket. The Ginger White Tea is my personal least favorite because I am not a ginger fan. These scents are spot on. If you enjoy ginger I would expect you to love the Ginger White Tea.
The Palmolive did an incredible job at cleaning my dishes. I filled up my soap scrubber brush and ended up only using a tiny bit of soap. That tiny little bit of soap cleaned all my dishes in my sink.  Including a crockpot with gunk stuck to the sides. This soap suds up much better than I expected. I thought that I would have to use a great deal more soap because I had never had any experience with the Palmolive before. I loved that compared to my other soap I use this one didn't leave a coat of soap on my dishes. You know what I'm talking about. That thin layer that no matter how much water and scrubbing you do it just never seems to want to come off. Yeah that stuff is no more with this soap. I didn't notice any adverse effects on my hands from this soap. This is not infused with lotion like other soaps but I didn't notice any drying out of my hands with this soap.
You can check out the Palmolive website right HERE. While I love this soap (seriously, lime basil is an addicting scent) I will probably venture out and try another scent or possibly a different formula. I'd love to try their Palmolive eco. 

If you are interested in trying Palmolive Fresh Infusions out for yourself then you need to head on over to your local Walmart or visit them online to pick up your favorite scent.

Thank you for visiting. I hope this was informative and helpful!
Tiffany

Disclaimer: I received these products free from Influenster for my honest review. I was in no way influenced and the opinions stated are that of my own.

Thursday, February 7, 2013

Sunset beach nails


I am going to show you how to create beautiful sunset nails and share my love for my Neutrogena hand cream!

What you need:
*3 bright colors
(pink, orange and yellow work well)
*1 black stripe polish
(I used Kiss Nail Art)
*Clear Top Coat
*Hand Cream 
(I used Neutrogena Norwegian Formula)

Optional:
nail file
polish remover


 1. Paint bottom half your darkest color
 2. Paint middle your next darkest color. This doesn't need to be perfect you want a whimsical sunset feel to your nails. No straight lines.
 3. Paint the top the lightest color. Think whimsical!
 4. Take your black stripe polish and make 2 V shapes angling slightly differently.
 5. For the Palm tree you just want to make a small hump in the corner of your nail. Stripe a triangle above it. A few lines from the top of the triangle.. you want the lines to get thick to thin. Making them lean the way the bottom of the triangle leans will give it a more real look.
6. Paint on your clear top coat.
 7. To add additional protection for your nails and hands use a hand cream afterwards. I love and highly recommend the Neutrogena Norwegian Hand cream as it has provided my hands with continuous moisture. I would have never even thought about using this product after a manicure had I not received the product through BZZAGENT. My nails are looking better everyday and I think everyone should think about using it for all of its amazing benefits to your hands. You only need a tiny little bit for both of your hands. There is no greasy residue so there is no worry of slippery hands!


 I hope you enjoyed this! Love to hear feedback.
TIFFANY


Sunday, December 30, 2012

Covergirl Blastflipstick review and giveaway.


WhooHoo for this awesome new product from Covergirl! I am loving my blastflipstick.  Honestly, when I first received the product I thought "So it is just like every other lipstick." I was proven wrong in my thoughts. This lipstick will replace all of your current lipstick (IMO).


PROS:

  • 13 sticks. Each stick has two colors that blend together to make a great third shade. If you were to buy all 13 sticks you would end up with 39+ colors. I have mixed/blended different shades together and the color combinations are endless.  Check out the colors HERE!
  • It has a really long wear time. As long as you are not applying too thick of layers these colors really stay put.
  • I love the shimmer. One end of the lipstick is a solid color. The other is this awesome shimmer that I think just makes my lips look amazing.
  • You can really let your personality shine with this lipstick. These unique blending shades give you the option to really make the shades your very own. 
CONS:

  • When applied in a thick layer it does seem to smudge and rub off really easily. The trick here is to apply in less layers. After I figured out the look I liked the most it was very easy for me to master.
  • Possibly the price. It is a little pricey for me. However, given the fact that you are given the option of 3-4 shades from one lipstick..... I'd say it is worth it. 
My testing: (I can not believe I am sharing these pictures. The flash completely washed me out.)
Stunner shimmer

Stunner coral
Vixen rose

Vixen shimmer

I absolutely loved the stunner coral color. I thought it complimented my skin tone nicely. I enjoyed the vixen color as well but I don't feel the contrast between the two shades is as drastic as the other.

My favorite look that I created with the blastflipstick:
  1.  Apply the darker smooth shade all over both the top and bottom lips
  2.  Apply the shimmer just in the center of both the top and the bottom lips
This look worked great for me. It caused the eye to focus on the center making my thin lips look plumper. Much more kissable for the hubby. ;)


Thanks for stopping by. Be sure to enter the giveaway!
♥Tiffany 

Disclaimer: I received one or more products for free from BZZAGENT in exchange for my honest opinions. The thoughts and opinions stated are that of my own.  
*I will be responsible for the shipment of the prize. Bzzagent nor Covergirl are responsible for shipment of the prize. All entries will be verified prior to picking a winner. The drawing for the prize will be done via rafflecopter. Please respond within 48 hrs of the end of the drawing as to not forfeit your winnings. Must reside in the US.

Now I am giving one lucky person who visits this blog the chance to win a flipstick of their very own in MINX. I will also be throwing in some coupons and a few other freebies.


Saturday, December 8, 2012

Ugly Christmas lights turned chic


  I know the sound on that video is awful. I swear it wasn't like that before I uploaded it to YouTube. I am going to write out some instructions as well because of the bad quality of video.
DISCLAIMER: Please when using Christmas tree lights around small children practice caution.

Materials

  • ugly Christmas lights
  • tulle (rolls or bolt)
  • scissors


Instructions

  1. Tie your tulle onto the end of your cord and knot. (If using the bolt just cut off strips of tulle)
  2. Begin wrapping the cord with the tulle.
  3. When you come to a light simply wrap the tulle around once or twice.
  4. When you have finished wrapping the cord with tulle you may begin adding the bows to the lights. To start, cut smaller strands of tulle. I like about 10 inches or so. Begin tying small individual bows around the lights.(I prefer to make a knot around the base of the light/cord.)
  5. Admire your beautiful work.

Finished Product Photos:
(these haven't been edited but they give you an idea of how they will look before the "prettying" process.)


ENJOY, Have Fun and Happy Holidays to you and yours!
♥TIFFANY♥

Sunday, December 2, 2012

Old Navy style council sweater review

  I have talked about my involvement with CROWDTAP.com before. Today, I am writing this review for the Old Navy style council as part of a Crowdtap activity that I accepted.  I was given an in-store coupon for ANY free sweater of my choice. I was also given an additional coupon for a friend.

  So lets just get right into this.  I first went straight to OldNavy.com to look at all of the gorgeous sweaters available.  Then I headed off to my nearest Old Navy store to pick out my sweater. The store was easily navigable and very clean. (Even though it was the day after Black Friday.) I got to admit I was very impressed by this. I thought for sure I'd walk into a mess and everything would be flung everywhere. Back on target though... There were so many beautiful, soft and cozy sweaters. Truly it was difficult to pick just one. There were casual sweaters. Dress up and stand out sweaters. Cardigans... o so many soft cardigans.
So we set off on our mission. Trying on practically all of them. Joann decided on this Women's Softest Sweater Cardis in Charcoal Heather Gray.
 Where as I went with the Women's Fair Isle-Stripe Cardis in this beautiful Marshmallow.

  I really love my sweater. I had a hard time deciding between a size small and medium though. Taking the advice from those who were with me, I went with the medium. I probably should of gone small..
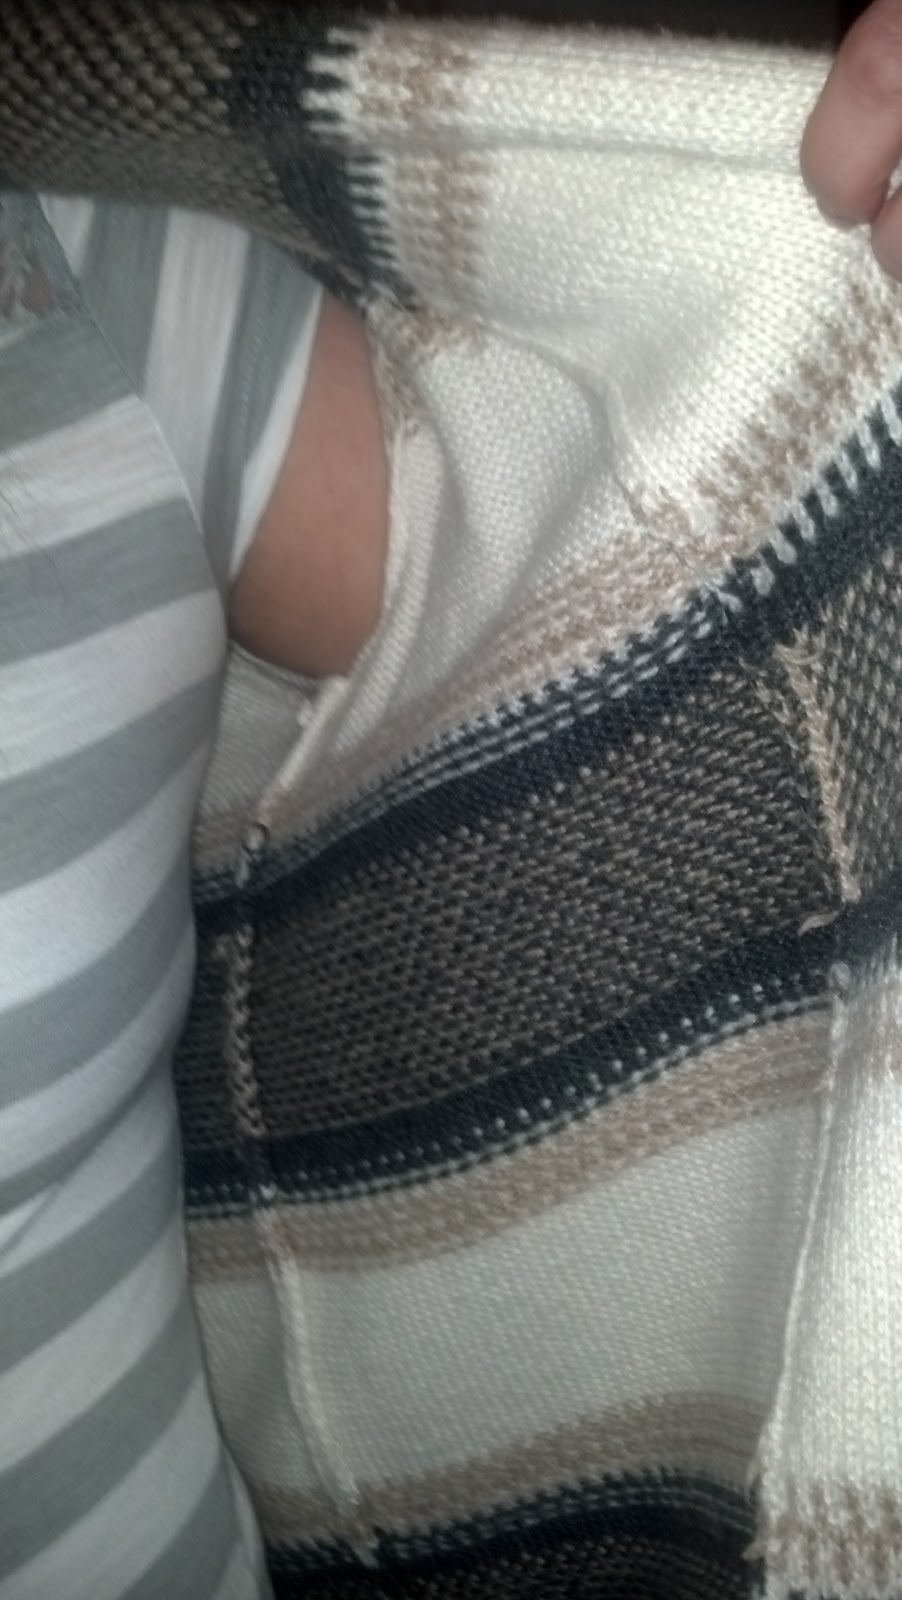
  This first picture shows how the medium was slightly too big...
 The front has this double layer of fabric.
 Here is the neck of the sweater.

 This sweater was quite long but I am only 5'2. I actually really like the length when I pair it with leggings and boots!
 Overall, I can not say enough great things about these sweaters. They are sooooo incredibly soft and warm.  I love to pair my sweater with an Old Navy perfect tee.
Check out all the great clothing at Old Navy and maybe even tweet @OldNavy a picture or two of your outfit finds..

DISCLAIMER:  I was given these products for free from Crowdtap in exchange for my honest opinions. The thoughts and opinions stated are that of my own. In no way was I influenced by Crowdtap or Old Navy.

Enjoy your day,
Tiffany

Sunday, November 18, 2012

Where to go from here?

LOST.... I have been trying to find my niche. Something that I really love to talk about, share about and something that I could keep up with on this blog. So far I have come up with nothing. I originally started this blog to share my love of photography. That was fleeting. While I do love photography, I don't think it is something for me to constantly be blogging about. Then there was my crafts. While it would be nice to be all famous on PINTEREST, I hate the thought of people using my ideas without giving back the appropriate credits.  Then I moved on to food. I love cheap easy simple meals. I just believe I'd rather add one meal a month or week or so. I followed all this craziness with my getting back into shape which failed miserably when I became ill and gained a ridiculous amount of weigh. I do enjoy reviewing things and I add reviews constantly to this blog. I just don't want to ONLY do reviews as that seems a bit boring to me.  

   So here lies the problem. Where do I fit in? Where does this blog fit in? I could write all about my adventures in mommyhood..... but would I really want everyone to know of my failures as a parent?
   So while I work up to finding my place within all these other blogs... today I shall write about getting back back in shape.

   Last year while my husband was deployed I rocked me some workouts. By the end of December I weighed right about 123, had muscle definition and had said goodbye to the dreaded muffin top. I got very sick soon after. January came around and I was constantly tired for no reason. By March I had a constant stomach ache, bloated, nausea and the fatigue anytime I ate(it seemed anyways). End of March I was weighing 130 something and gaining. July I was completely fed up and did some major research into why I was feeling so bad. I had developed an intolerance for lactose (which explained my yuck feeling after eating). I developed my intolerance as a result of my Chronic Fatigue Syndrome. Fast forward to the beginning of November....  I was weighing 160 on a bad day! On Nov 7 I made a great effort to avoid all dairy products. I weighed in on Nov. 14 and  I had lost 4 pounds just from counting out the dairy. I lost 2 inches off my waist and it was no longer hard as a rock. Since then I have not done so well. I ate pizza over the weekend. Even though I took a LACTAID pill before eating it only helped immediately after.  I regretted it a great deal the next morning. I awoke to a bloated, hard and cramping belly. 
There is no real treatment for CFS. I do however try to take an additional B12 vitamin every morning to help me get through the day. I am slowly trying to get up the energy to add more exercise into my life to help as well. I have found it to be very difficult though. 
So there it is.... my sob story about my health. Send me good thoughts. I really could use all the help that I can get.


Friday, September 28, 2012

UNREAL candy Review


I recently participated in a BzzAgent Campaign for UNREAL candy.
I have to admit I was a bit skeptical on if I would enjoy it but I gave it a try.
About the candy
NO CORN SYRUP
NO PARTIALLY HYDROGENATED OILS
NO ARTIFICIAL INGREDIENTS
NO GMOS
NO PRESERVATIVES
Has a LOW GLYCEMIC INDEX
You can check out this WHAT IS IN A COLOR link to find out how UNREAL dyes their candies the unjunked way.

My take on this candy
I was only able to try out two of the UNREAL candy bars because my local stores either hadn't started to sell them yet or they were sold out.
I tried out #5 and #8.

Lets start with the #5. It tasted very similar to a milky way.
-Same consistency
-It has 16 grams less of sugar.
-It has 4 grams more of fiber.
I really liked this. While I do not need a lower sugar candy bar for any major health concerns I do like to try and keep my sugar and carbohydrates that I consume to a minimal. This product helps me do that while not losing any flavor.
Now on to the #8(my favorite new candy bar)
This candy bar is similar to a Snickers.
The caramel, peanuts and nougat were like an exact replica.
-This bar has 13 grams less of sugar
-It also has 4 grams more of fiber
My kids loved these! They were gooey and sweet... everything that my kids would ever hope for in a candy bar.

So in the end... so far I love these. Soon I will try their peanut butter cups and m&m replicas and update this then. So happy snacking. Enjoy!
♥TIFFANY♥
Disclaimer: I was given one or two of these products for free or discount from BZZAGENT in exchange for my honest opinions. The thoughts and opinions stated are that of my own.